Using Notion + Python for Creating A Smart Stock Screener
- Nikhil Adithyan

- Oct 10, 2025
- 8 min read
An effective integration for automated stock screening

When investing in stocks, stock screeners are among the most useful tools for finding opportunities. These are essentially databases containing a wide range of information about stocks, from basic details like the sector a stock belongs to, to fundamental data such as the PE ratio, and technical indicators like whether a stock is oversold or overbought based on RSI. There are many stock screeners available online, with Yahoo being one of the most well-known.
A major issue with stock screeners is that you’re limited to the predefined data they provide, along with their filtering options and user-friendliness. For example, imagine a stock screener with a complex filter designed to find new opportunities based on your strategy, which takes time to set up each time. If you need to do this daily, it can quickly become frustrating. How annoying this is.
This article aims to address the issue by building a custom stock screener that uses FinancialModelingPrep endpoints to fetch data. We will store this data in a Notion database and set up saved filters to quickly spot opportunities aligned with our strategy.
What is Notion, and how are we going to use it
Notion is a productivity tool that combines note-taking, task management, and collaboration in one platform. A key feature of Notion is its databases. Think of them as enhanced Excel tables. If you’d like to understand their features better before we start developing our small project, you can visit their help webpage and watch their videos.
What we are going to do in this article is the following:
We are going to create a database for our stock screener
Explain how you can connect through the Notion API to manage this database
Gather data using FMP endpoints and upload them to Notion
Check how we can filter our data and save predefined filters that we are going to use with our strategy
Creating a database in Notion
When you write /database in any Notion page, you'll notice that Notion suggests creating a database page. We will choose this option so that our database appears in full screen, rather than embedded within another page.

Then we will give it a name as “My Custom Sreener” as below

Then we will begin adding the fields required for it. In our example, we will use the following:
Name: It is already there, and we will be adding the stock’s ticker
Company Name (text)
Market Cap (bn) (number): the capitalisation of the stock in billion USD
Sector (select field)
Industry (select field)
beta (number): the beta of the stock
price (number): the current price of the stock
rating (select field): the rating of the stock
Overall score (number): the overall score of the stock from 1 to 5 (as all the scores below)
ROE Score (number): the score of Return to Equity
ROA Score (number): the score of Return on Assets
Debt to Equity Score (number)
Price to Earnings Score (number)
Price to Book Score (number)
You have noticed that for each field, we need to specify the type of information we will store. When adding each field (or property, as Notion calls it), you will see all the options listed below.

After adding the above properties, your empty database will look like the following:
Press enter or click to view the image in full size:

Connect to Notion API
Apparently, you will need to connect to Notion via their API to create rows in your database. We will explain how to do this step by step.
First, you need to go to https://developers.notion.com/, where all the preparation of giving access is done, and select “View my integrations”:

Below is the page where all your integrations are listed. You should select “New Integration”:

Below is the way to create an integration.
For the associated workspace, you will likely have only one, except if you are a heavy user of Notion, so you are familiar with what we talk about!
Type you should select Internal.
Upload a logo if you want (I did not).

And your integration is created! What you need to keep from here is the “Internal Integration Secret” which you can consider as your API key, and we will use it later on.

One last thing is to grant access for the specific integration to access the database you previously created. You can do this from the ‘Access’ tab.

And select the database below.

Let’s get the data
Now that we have created our database, we are ready to get our data using Python.
First, you need to import the necessary libraries and set up your FMP token.
import requests
import pandas as pd
import json
from tqdm import tqdm

token = '<YOUR FMP TOKEN>'
Next, we will use the FMP’s Stock Screener API to find some stocks. Apparently, you can perform your own query to get as many stocks as possible that fit your strategy’s criteria. We will select Nasdaq stocks with a market capitalisation of more than 20 billion USD.
url = f'https://financialmodelingprep.com/stable/company-screener'
querystring = {"apikey":token, "marketCapMoreThan":20_000_000_000, "country":"US", "exchange":"NASDAQ", "isEtf":"false", "isFund":"false", "isActivelyTrading":"true"}
resp = requests.get(url, querystring).json()

df = pd.DataFrame(resp)
list_of_tickers = df['symbol'].to_list()
Then we will loop through the stocks, and enhance our dataframe with the scores from FMP’s Rating Snapshot API.
ratings = []
scores = []
dcf_scores = []
roe_scores = []
roa_scores = []
dte_scores = []
pe_scores = []
pb_scores = []

url = 'https://financialmodelingprep.com/stable/ratings-snapshot'

for symbol in tqdm(list_of_tickers):
    try:
        resp = requests.get(url, params={"apikey": token, "symbol": symbol})
        if resp.status_code != 200:
            print(f"Error fetching ratings for {symbol}")
            ratings.append(None)
            scores.append(None)
            dcf_scores.append(None)
            roe_scores.append(None)
            roa_scores.append(None)
            dte_scores.append(None)
            pe_scores.append(None)
            pb_scores.append(None)
            continue
        data = resp.json()
        if isinstance(data, list) and len(data) > 0:
            item = data[0]
            ratings.append(item.get('rating'))
            scores.append(item.get('overallScore'))
            dcf_scores.append(item.get('discountedCashFlowScore'))
            roe_scores.append(item.get('returnOnEquityScore'))
            roa_scores.append(item.get('returnOnAssetsScore'))
            dte_scores.append(item.get('debtToEquityScore'))
            pe_scores.append(item.get('priceToEarningsScore'))
            pb_scores.append(item.get('priceToBookScore'))
        else:
            print(f"No ratings found for {symbol}")
            ratings.append(None)
            scores.append(None)
            dcf_scores.append(None)
            roe_scores.append(None)
            roa_scores.append(None)
            dte_scores.append(None)
            pe_scores.append(None)
            pb_scores.append(None)
    except Exception:
        print(f"Error fetching ratings for {symbol}")
        ratings.append(None)
        scores.append(None)
        dcf_scores.append(None)
        roe_scores.append(None)
        roa_scores.append(None)
        dte_scores.append(None)
        pe_scores.append(None)
        pb_scores.append(None)

df['rating'] = ratings
df['overallScore'] = scores
df['discountedCashFlowScore'] = dcf_scores
df['returnOnEquityScore'] = roe_scores
df['returnOnAssetsScore'] = roa_scores
df['debtToEquityScore'] = dte_scores
df['priceToEarningsScore'] = pe_scores
df['priceToBookScore'] = pb_scores
df
This script will generate a dataframe containing the data points used to update our Notion-hosted custom stock screener.

Let’s update Notion’s db
Now that we have all the data, it is time to get into the real action and update Notion. One of the first things you need to do is to identify the database ID. This is quite easy. You will find it in the URL of your browser while you are on the database’s page. It will look like the one highlighted below:

Then we will set up two more parameters in our Python code. The database’s ID and the token that we got before from the Notion integration
NOTION_DB_ID = '<YOUR NOTION DB ID>'
NOTION_TOKEN = '<YOUR TOKEN>'
When updating a Notion database, we need to create a dictionary formatted in Notion’s specific way. Below, you’ll develop a function to accomplish this, noticing different approaches for each type of field we previously created. There are also other types of fields, and if you need them for your project, you can easily find information about them through a simple search on Notion’s help pages.
def create_notion_db_properties(row):
    properties = {
                    "Name": {
                        "title": [
                            {
                                "text": {
                                    "content": row['symbol']
                                }
                            }
                        ]
                    },
                    "Company Name": {
                        "rich_text": [
                            {
                                "type": "text",
                                "text": {
                                    "content": row['companyName']
                                }
                            }
                        ]
                    },
                    "Market Cap (bn)": {
                        "number": round(row['marketCap']/1000000000,0)
                    },
                    "Sector": {
                        "select": {"name": row['sector']}
                    },
                    "Industry": {
                        "select": {"name": row['industry']}
                    },
                    "beta": {
                        "number": row['beta']
                    },
                    "price": {
                        "number": row['price']
                    },
                    "rating": {
                        "select": {"name": row['rating']}
                    },
                    "Overall Score": {
                        "number": row['overallScore']
                    },
                    "ROE Score": {
                        "number": row['returnOnEquityScore']
                    },
                    "ROA Score": {
                        "number": row['returnOnAssetsScore']
                    },
                    "Debt to Equity Score": {
                        "number": row['debtToEquityScore']
                    },
                    "Price to Earning Score": {
                        "number": row['priceToEarningsScore']
                    },
                    "Price to Book Score": {
                        "number": row['priceToBookScore']
                    },
                }

    return properties
Now that we have set up our dictionary, we will loop through our dataframe with the stocks and call a Notion API to insert the stock into our screener. How will Notion understand where to add the data? Well, take a look at the code. The header contains our token, and the payload includes our database’s ID. That’s simple!
headers = {
        'Authorization': f'Bearer {NOTION_TOKEN}',
        'Notion-Version': '2021-08-16',
        'Content-Type': 'application/json'
    }

for idx, row in df.iterrows():
    try:
        url = "https://api.notion.com/v1/pages"
        payload = {
            "parent": {"database_id": NOTION_DB_ID},
            "properties": create_notion_db_properties(row)
                    }
        response = requests.post(url, headers=headers, json=payload)
        if response.status_code != 200:
            print(f"Error creating page for {row['symbol']}: {response.text}")
    except Exception as e:
        print(f"Error creating page for {row['symbol']}: {e}")
After we run the code, we will be able to see our database full of data!
Fun fact: Keep the screener open in your browser while running the code. You’ll see the rows appear one by one. The less fun part is that this API isn’t the fastest, so if you’re planning to screen many stocks, expect it to take about half an hour for a thousand stocks.

Using our custom screener
Now that we have our screener full of data, let’s see how you can set up a couple of filters and save them, so you don’t have to do that every time, like the free stock screeners out there on the web.
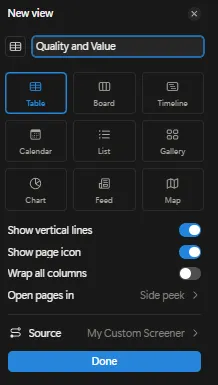
The first thing you need to do is press the + sign below and select Table.

You should give it a name, then you will see it ready on the right of the initial table.
But let’s see actual examples.
Filter 1: Quality & Value Screener
The logic of this screener is to combine above-average profitability with reasonable PE, avoiding the stocks that are of high market capitalisation, targeting balanced growth in the long-term horizon.
ROE Score > 3
PE > 3
Market Cap < 40 Billion
Sorted by Overall Score Descending

This will provide us with the following results (based on the data at the time I ran the script), the first six.

Following Warren Buffett’s logic that you should invest in sectors you understand, I noticed that Zoom is quite high on the list. That is one stock I will definitely check after I finish this article. ;)
Filter 2: Conservative Dividend/Growth
This filter will identify steady, lower-risk stocks with strong financial health and solid efficiency.
Debt to Equity ≥ 3
ROA score > 3
Sort by Overall score descending

Below are the results. What is interesting is that only the Technology sector made it through this filter. And what is more interesting is that Zoom is still in the list, this time at the top!

Filter 3: Large-Cap Momentum & Quality
The logic of this strategy is to identify large-cap growth leaders with strong fundamentals and momentum characteristics.
Market Cap > 50 Bn
Overall score ≥ 4
beta > 1.1 (captures stocks with above-market sensitivity — potential for strong momentum moves)
PE ≥ 3

Only three stocks from my dataset passed this test, and two of them are in Technology and semiconductors, which makes sense given today’s AI world!

Conclusions
Once you’ve finished this project, you’ll have a database with your predefined filters that you can always review with your morning coffee. Stock screeners are an essential tool in an investor’s arsenal. And when free screeners are limiting you, it’s important to turn to a custom-made solution to support your ideas with data.

Apparently, this post is an example, and the stock dataset can be much more extensive, allowing you to implement various filters depending on your investment style. As Warren Buffett is a cornerstone of value investing, with a custom stock screener, you can turn his quote, “Price is what you pay. Value is what you get,” into reality.
I hope you enjoyed the article, and thank you for reading.


Comments